
Patient10x Reviews Made Easy: Help & How-To Library
Welcome to Patient10x! This guide will walk you through each step from accepting your email invitation to accessing your dashboard and getting started with managing reviews. Let's dive in and ensure you're all set up to begin.
Step 1: Accepting Your Invitation
1. Check Your Email
You’ll receive an invitation email from Patient10x to join the dashboard. This email includes a unique link that grants you access to your account.
Tip: Check your spam or promotions folders if you don’t see the email.
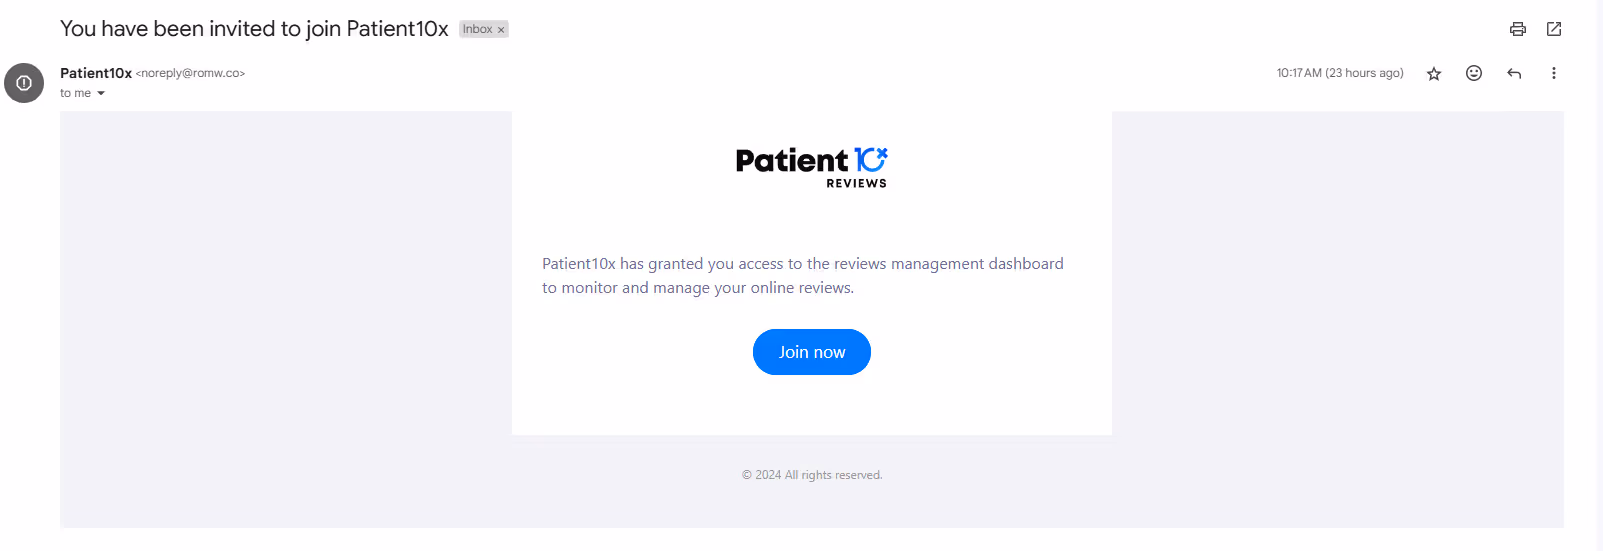
2. Open the Invitation
Click “Join Now” in the email to begin setting up your account.
The link will redirect you to the Patient10x onboarding page, where you'll start the account creation process.
Step 2: Setting Up Your Account
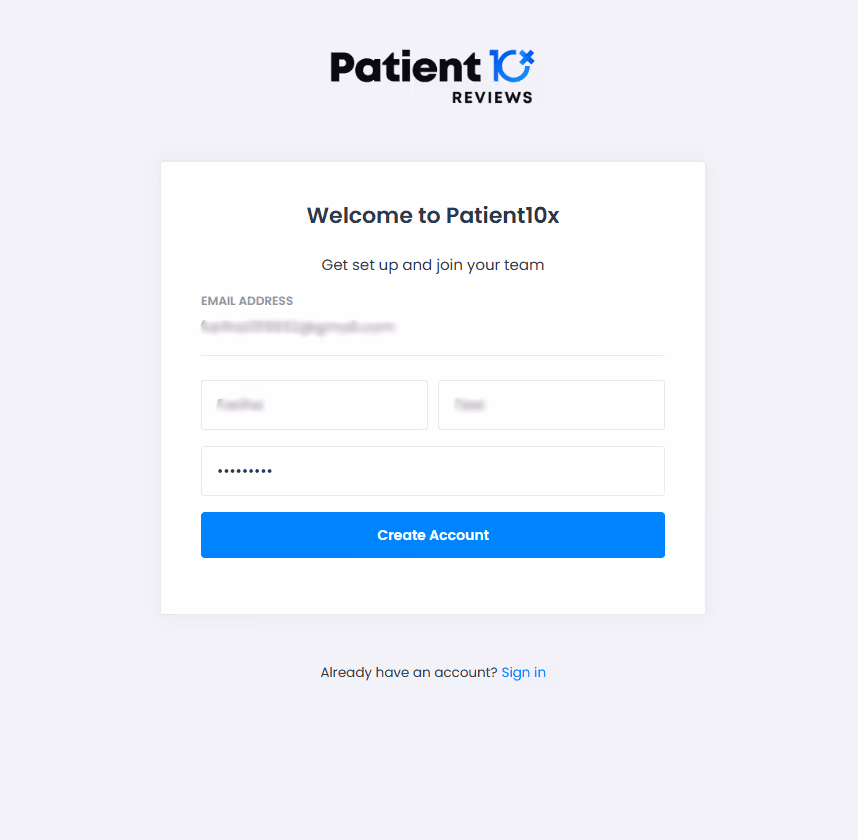
1. Create Your Login
You’ll be prompted to set a secure password. Make sure it's something memorable but secure.
Fill out any additional information required, such as your name, and click on the “Create Account” button. You’ll be directed to the Patient10x Reviews Dashboard.
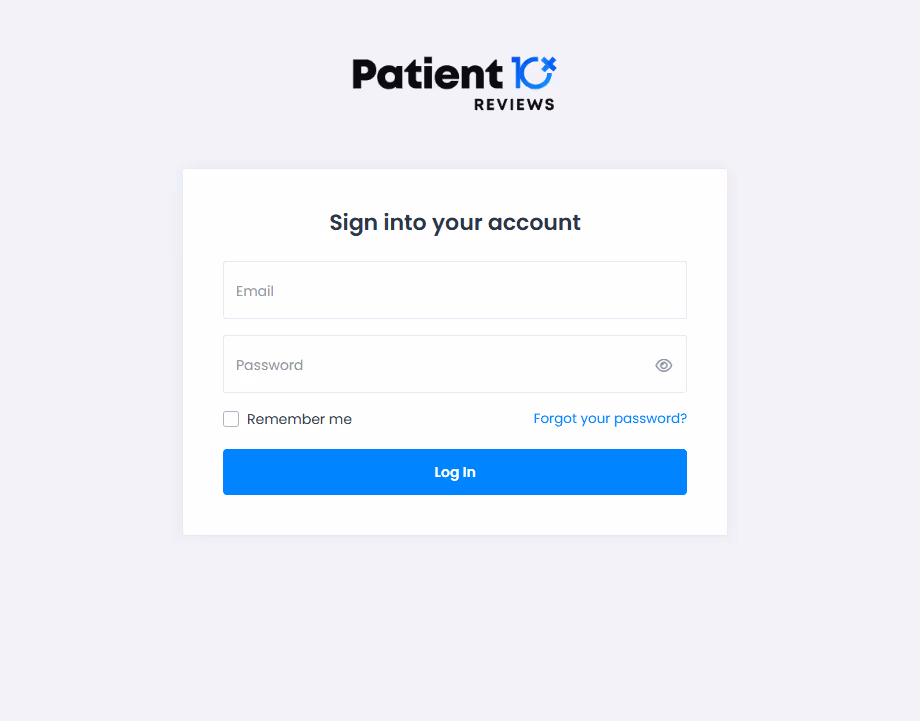
Once you have successfully created the account, you can log in using your credentials from https://reviews.patient10x.com/login.
Step 3: Exploring the Dashboard - Navigating Your Dashboard
Welcome to the Patient10x Dashboard! In this section, we’ll walk you through the main elements of your dashboard and how to navigate the menus to manage, display, and collect reviews effectively. Let’s dive into what each part of the dashboard offers.
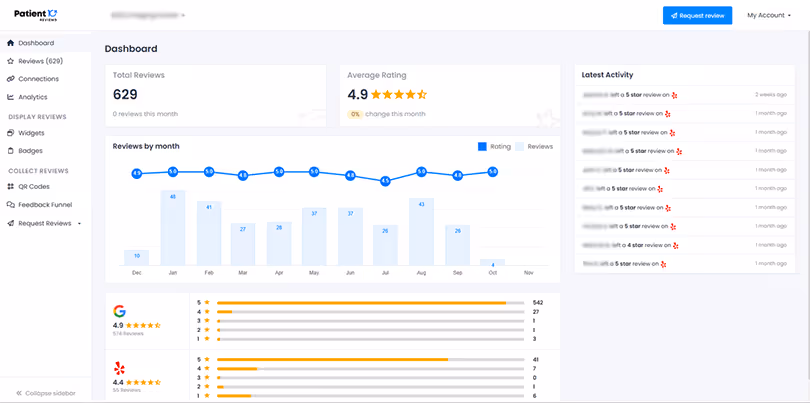
Dashboard Overview
The Dashboard gives you a quick snapshot of your account’s review performance:
Total Reviews: This shows the total number of reviews your business has received, with a counter for the current month to monitor recent activity.
Average Rating: Displays your average customer rating, represented with stars and a percentage indicator that shows changes in rating from the current month.
Reviews by Month: A bar and line chart that illustrates the number of reviews and the average rating each month. This helps track trends and identify peak periods.
Latest Activity: A live feed of recent customer interactions, showing who left a review, the platform (e.g., Yelp), the rating, and the time since the review was posted. This allows for quick, real-time insights into customer feedback.
Switcher: The switcher on top allows you to switch between your location accounts and provides an overview of each account.
Display Reviews
The Display Reviews section helps you showcase your positive feedback to new and potential customers.
Widgets: Create embeddable widgets to display reviews on your website, making it easy for visitors to see your ratings and testimonials at a glance.
Badges: Generate badges to highlight your average rating or showcase specific achievements, such as “Top-Rated” or “5-Star Reviews.”
Collect Reviews
The Collect Reviews section is designed to make it easier to gather reviews from your customers through accessible methods.
QR Codes: Generate QR codes that can be printed or displayed digitally. When customers scan the code, they’re directed to a page where they can quickly leave a review.
Feedback Funnel: It allows you to collect customer reviews in a structured and customizable way:
Funnel Type: Choose between a rating-first, review-first, or direct-link approach to guide customers through the feedback process.
Rating Style: Select either a star rating or a thumbs up/down for customer feedback.
Review Gating: Optionally enables "review gating" to direct only positive feedback (e.g., 4 or 5 stars) to public review sites, which can help manage negative feedback internally.
Customization Options: Add your logo, set custom colors for the stars and background, and edit the title text.
Preview: The right panel shows a live preview of the feedback page as customers will see it.
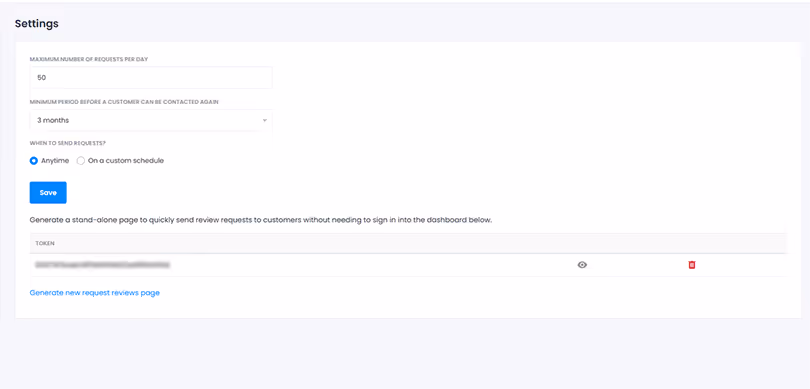
Request Reviews: Send review requests to customers through email and SMS. This feature simplifies the process of asking for feedback and increasing your review count. It also provides analytics of converted responses through email and sms. You can also configure the settings for the reviews as per your preference. The staff can also create a public-facing review page by generating a token.
Step 4: Sending Out Review Requests
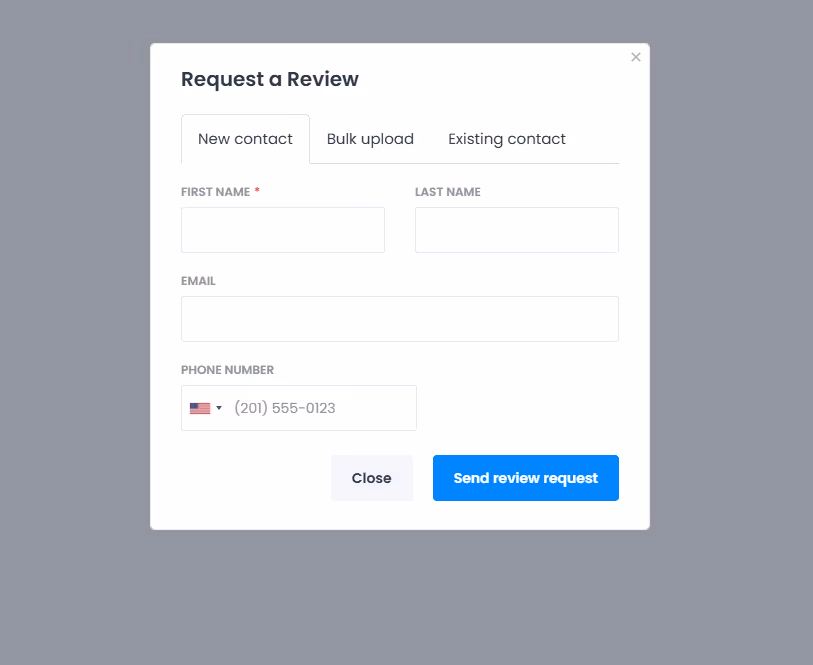
The Request a Review feature is a key function for gathering patient feedback efficiently. Staff members can use it to send out review invitations to patients, either one by one, in bulk, or from a list of existing contacts. Here's how each option works and tips for successful usage:
1. New Contact
The Dashboard gives you a quick snapshot of your account’s review performance:
Use this option to request a review from a single new patient.
Fields: to fill out:
First Name (required)
Last Name
Phone Number
After filling out these details, click Send review request to instantly send the invitation to the patient.
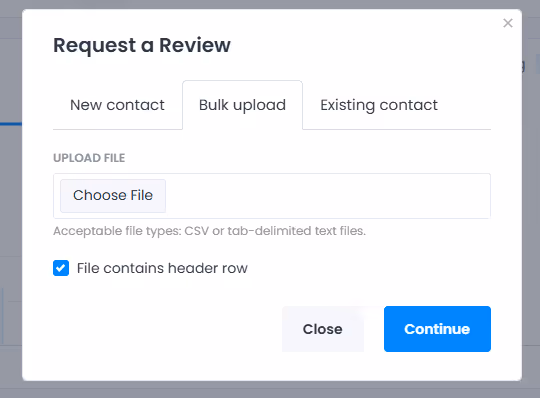
2. Bulk Upload
For convenience, you can send review requests to multiple patients at once by uploading a list. This is ideal for end-of-day or weekly review requests.
Bulk File Format:
Upload a CSV file or tab-delimited text files, with the following headers:
First Name: First name of the patient
Email: Email address for delivering the review request
Phone Number: Patient’s contact number (ensure to provide the correct number for this to work)
Ensure that each row contains complete information for each patient to prevent delays or missed requests.
Once the file is ready, upload it in the Bulk Upload tab and click Continue.
A panel named Import Contact will open up containing the uploaded document information and an option to map the data to the appropriate fields via the drop-down menu.
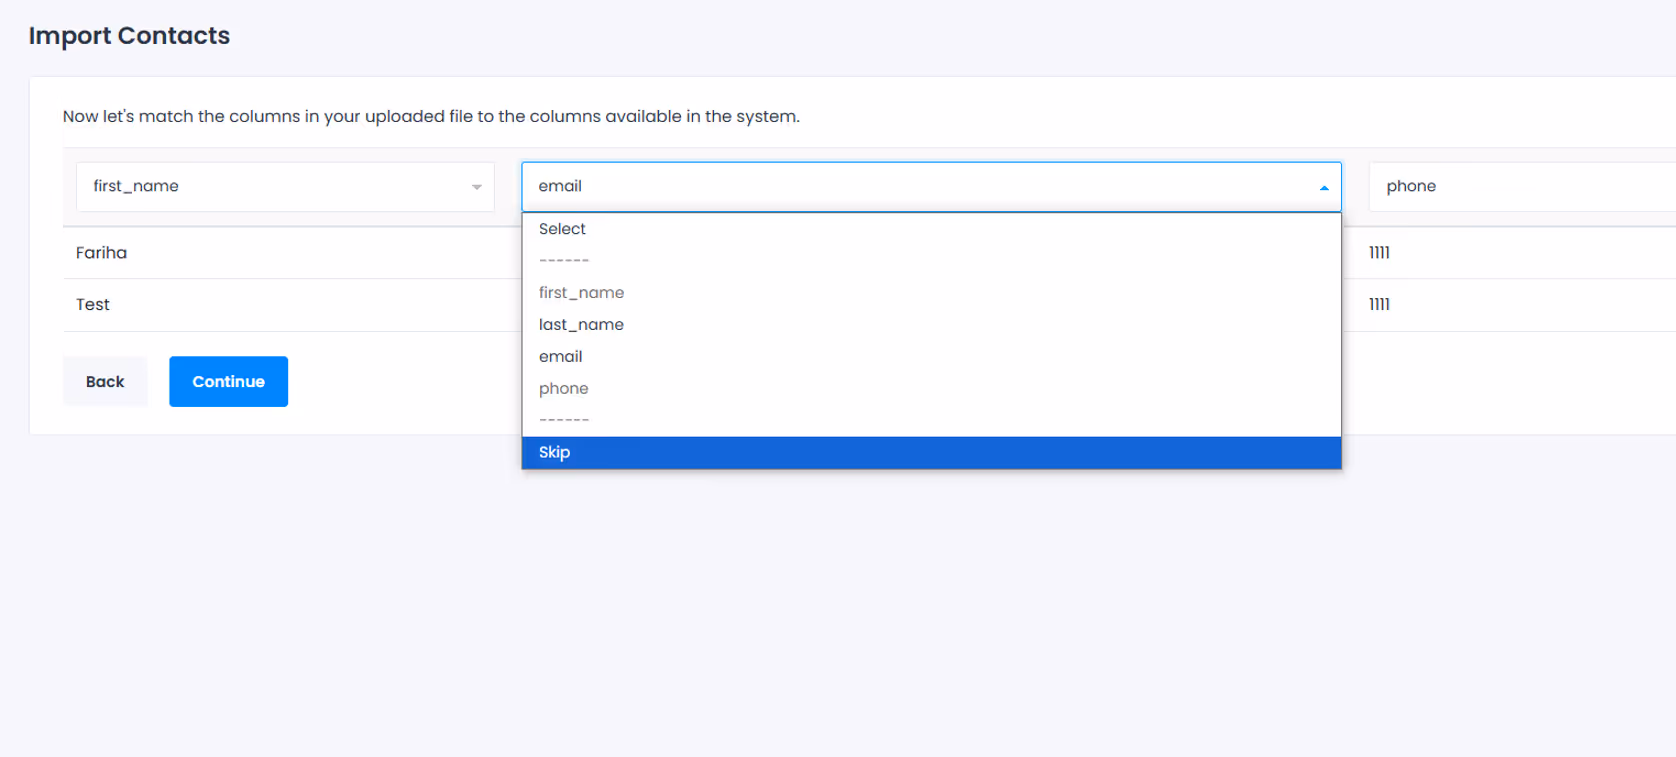
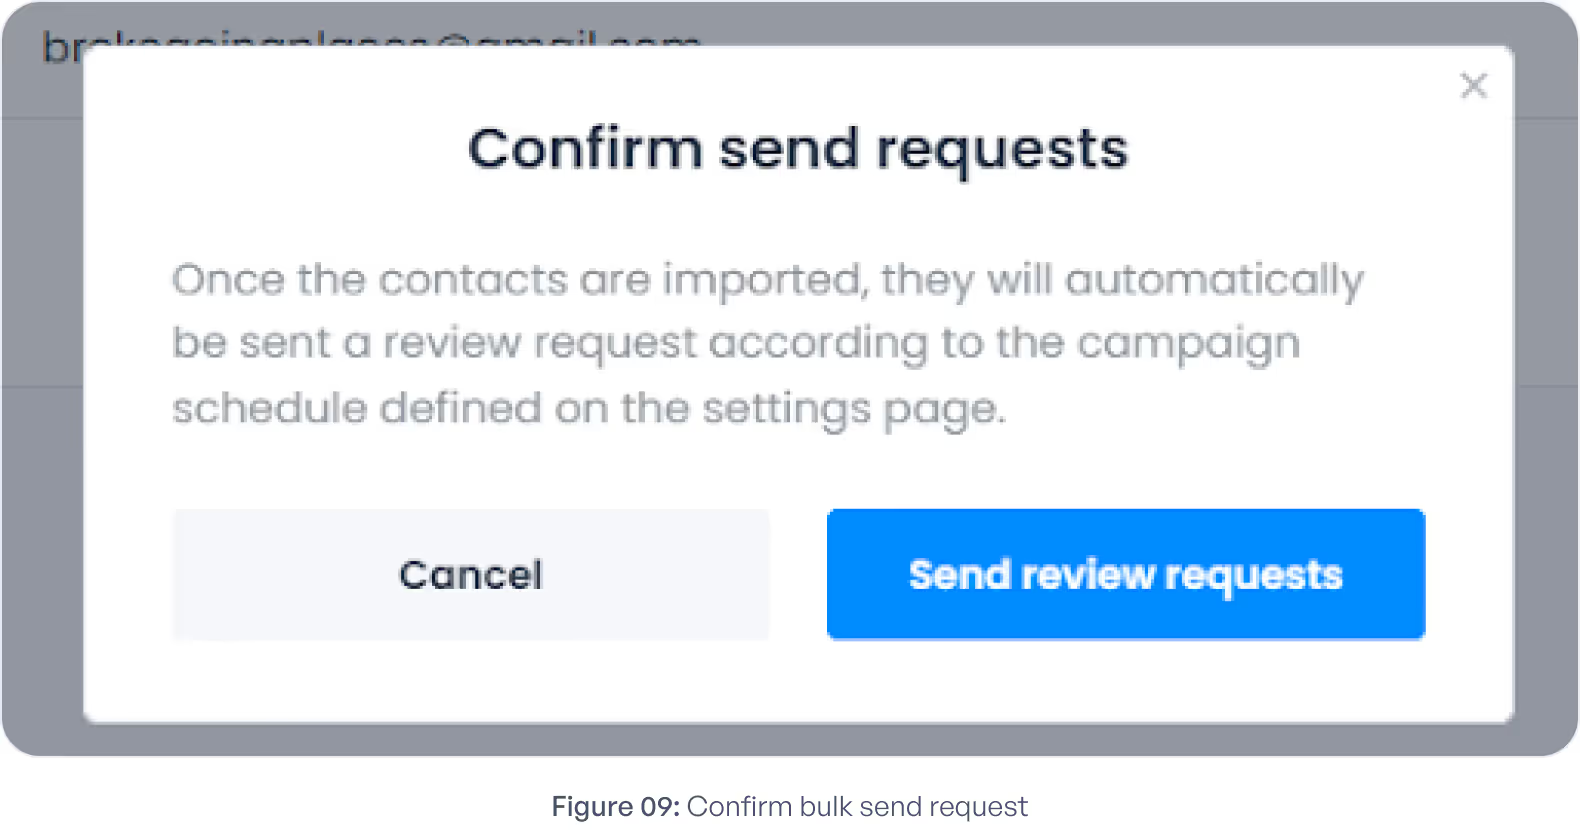
Upon clicking on Continue, a confirmation pop-up will appear and the emails will be sent
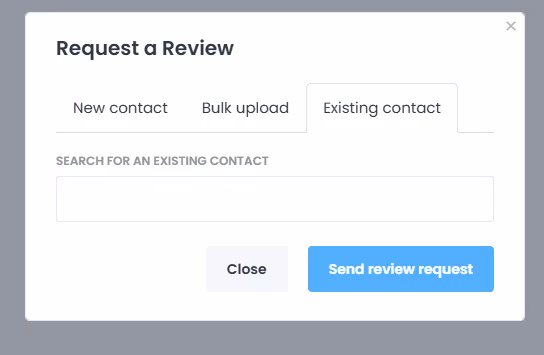
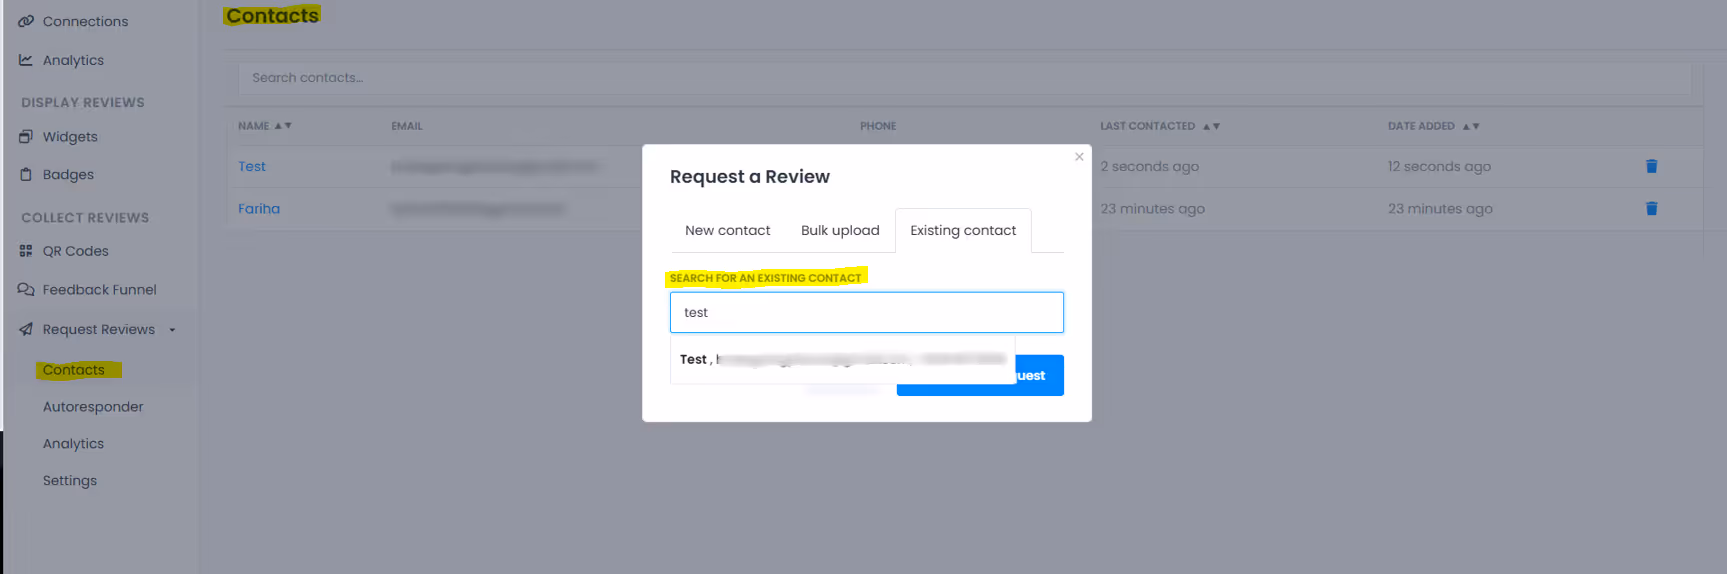
3. Existing Contact
Use this option to send a review request to patients already in the system (you can find the list of contacts in Collect Reviews >> Request Reviews >> Contact). This can be helpful for follow-ups or sending reminders to patients who haven't left feedback yet.
Search and select the desired contact and click Send review request.
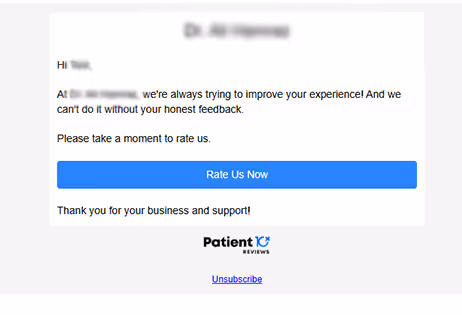
The patients will get a review email with a Rate Us Now option.
Using the Request a Review feature effectively will help ensure a steady flow of patient feedback, supporting quality improvements and building a positive online presence.